To lay peel and stick tiles that last, start by prepping your surface thoroughly. Clean it well and make certain it’s smooth and level. You’ll need a utility knife, straight edge, and a squeegee for installation. Measure accurately and mark your starting point for precise placement. Install within the suggested temperature range and seal the tiles afterward for protection. Avoid common mistakes to guarantee durability and aesthetic appeal. Keep going to discover more tips for a successful installation!
Article Highlights
- Thoroughly clean and prepare the surface to ensure maximum adhesion for lasting results.
- Choose the right peel and stick tile material suited for your environment and usage.
- Plan your tile layout carefully to minimize awkward cuts and ensure a visually appealing design.
- Install tiles within the recommended temperature range and allow them to acclimate beforehand.
- Regularly maintain tiles with non-abrasive cleaners and check for signs of wear or damage.
Understanding Peel and Stick Tiles: What You Need to Know
When you’re contemplating a DIY flooring project, grasping peel and stick tiles is fundamental. These tiles come in various types of materials, such as vinyl, cork, and laminate, allowing you to choose what fits your style and needs. You’ll love the ease of installation; simply peel off the backing and stick them down. Nonetheless, it’s important to evaluate installation longevity. Although these tiles can provide a quick and budget-friendly solution, their lifespan can vary based on the material and the environment. It’s crucial to guarantee proper surface preparation for ideal adhesion. By comprehending these factors, you’ll feel more confident in creating a space that feels like home, where you can truly belong and enjoy the comfort of your surroundings.
Choosing the Right Peel and Stick Tile Design
Choosing the right peel and stick tile design can transform your space, especially if you consider your existing decor and personal style. Here are some key factors to keep in mind:
- Color Options: Choose colors that complement your existing palette for a cohesive look.
- Design Patterns: Consider geometric patterns or classic designs that fit your aesthetic.
- Texture Variations: Incorporate tiles with different textures to add depth and interest.
Also, think about application areas—kitchens, bathrooms, or living rooms—and confirm style coordination with your furniture. Finally, keep budget considerations in mind during the selection of tiles that require minimal maintenance to maintain their beauty. With the right choices, you’ll create a welcoming space that truly reflects who you are.
The Benefits of Using Peel and Stick Tiles
Peel and stick tiles are a revolutionary innovation for DIY home improvement enthusiasts. They allow you to transform your space quickly and effortlessly, creating a sense of belonging in your home. One of the standout benefits is their durability factors; these tiles are designed to withstand wear and tear, making them perfect for high-traffic areas. Plus, their design versatility means you can choose from a wide array of styles, patterns, and colors to match your unique aesthetic. Whether you’re going for a modern look or a classic feel, you’ll find options that resonate with your vision. So, if you want an affordable and stylish upgrade to your home, peel and stick tiles are the way to go.
Preparing Your Surface for a Flawless Installation
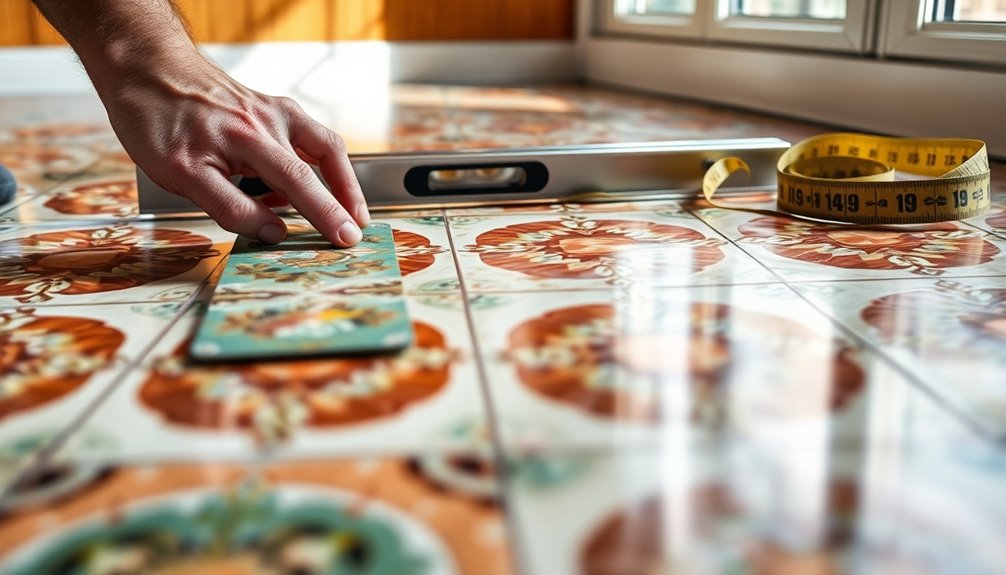
Before you start laying your peel and stick tiles, you need to prepare your surface properly. Make certain it’s clean, level, and smooth to guarantee the best adhesion and a flawless finish. Taking these steps will make your installation much easier and more successful.
Clean The Surface Thoroughly
To guarantee your peel and stick tiles adhere properly, it’s vital to start with a clean surface. No one wants their hard work to go to waste, so let’s make sure your surface types are prepped right! Here are three steps to follow:
- Remove Debris: Sweep or vacuum up any dirt, dust, or loose particles.
- Choose the Right Cleaning Solution: Depending on your surface type, use an appropriate cleaner—like a mild detergent for vinyl or a degreaser for tile.
- Wipe Down: Use a damp cloth to wipe the surface, ensuring it’s free of residue and thoroughly dry before installing.
Taking these steps not only prepares your space but additionally nurtures a sense of community and pride in your home. You’ve got this!
Ensure Leveling And Smoothness
Achieving a flawless installation of your peel and stick tiles hinges on a level and smooth surface. Before you start, take a close look at your flooring for any surface imperfections like cracks, bumps, or dips. These can prevent your tiles from adhering properly and ruin your beautiful design. Use leveling techniques such as self-leveling compound or a patching compound to fill in those pesky imperfections. Make sure to let it dry completely before proceeding. Once the surface is even, you’ll feel a sense of accomplishment, knowing your hard work will pay off in a stunning result. Trust me, the effort you put into preparing the surface will make your tiles last longer and look incredible!
Essential Tools for Installing Peel and Stick Tiles
When installing peel and stick tiles, having the right tools can make all the difference in achieving a smooth and successful project. Whether you’re a DIY newbie or a seasoned pro, these crucial tools will help you master tile cutting and follow useful installation tips.
- Utility Knife: Perfect for precise tile cutting and guaranteeing clean edges.
- Straight Edge/Ruler: Helps you measure and mark tiles accurately for perfect alignment.
- Squeegee or Roller: Secures good adhesion by eliminating air bubbles and pressing tiles firmly into place.
With these tools in hand, you’ll feel more confident tackling your tile project. Remember, preparation is key, and having the right equipment sets the stage for a fantastic finish!
Step-by-Step Guide to Installing Peel and Stick Tiles
Before you start laying your peel and stick tiles, it’s vital to prep your surface properly. Ensuring a clean and smooth area will help the tiles adhere better and last longer. Let’s go over the key steps for surface preparation and the right adhesive techniques.
Surface Preparation Essentials
Surface preparation is crucial for a successful peel and stick tile installation. It guarantees your tiles adhere properly and last longer. Here are three key preparation techniques to get you started:
- Clean the Surface: Remove dust, dirt, and grease from your chosen surface types. A clean area promotes better adhesion.
- Repair Imperfections: Fill in any cracks or holes. A smooth surface helps prevent tiles from lifting or cracking later on.
- Prime if Necessary: For porous surfaces, consider applying a primer. This step can improve adhesion and boost durability.
Taking these steps will help you create a solid foundation for your tile project, making it a rewarding experience for you and your home. Happy tiling!
Proper Adhesive Techniques
With a solid base prepared, you’re ready to focus on the adhesive techniques that will guarantee your peel and stick tiles stay firmly in place. First, choose the right adhesive types; many tiles come with their own backing, but you might want to add extra adhesive for tricky areas. Clean the surface before application to improve bonding techniques. Start in a corner, peeling off the backing slowly to avoid air bubbles. Press firmly as you go, ensuring each tile adheres well. For added security, use a roller to press down after installation. This not only boosts adhesion but also makes you feel accomplished in your DIY experience. Trust these techniques, and your tiles will look great for years!
Achieving Perfect Alignment and Spacing
Achieving perfect alignment and spacing is crucial for a professional-looking finish when laying peel and stick tiles. You want your project to look great, and with the right techniques, you can create a stunning result that you’ll be proud of. Here are some helpful tips:
- Use a Chalk Line: Snap a chalk line to guide your first row, ensuring straight alignment.
- Measure Twice: Always double-check your measurements before cutting tiles to maintain consistent spacing.
- Spacing Methods: Utilize spacers or a consistent gap to keep your tiles evenly spaced, preventing uneven edges.
Sealing and Protecting Your Peel and Stick Tiles
To guarantee your peel and stick tiles remain in top condition, sealing and protecting them is essential. With the right sealing options, you can improve their durability and keep your space looking fresh. Consider using a clear, water-based sealant that’s designed for vinyl surfaces. This protective coating forms a barrier against moisture and dirt, ensuring your tiles stand the test of time.
Before applying, make sure the tiles are clean and dry to maximize adhesion. After sealing, allow adequate drying time to achieve the best results. Regular maintenance, like gentle cleaning with non-abrasive solutions, will likewise help preserve their appearance. By taking these steps, you’ll create a welcoming environment that truly reflects your style and care for your home.
Top Mistakes to Avoid When Installing Peel and Stick Tiles
Though you’re enthusiastic to transform your space, overlooking key details when installing peel and stick tiles can lead to frustrating results. To guarantee your project looks great and lasts, here are some common installation errors to avoid:
- Improper Surface Preparation: Skipping this step can cause tiles to peel up or not adhere properly. Clean and level your surface thoroughly.
- Neglecting Layout Planning: Failing to plan your tile layout can result in uneven lines and awkward cuts. Take the time to measure and mark your starting point.
- Ignoring Temperature Guidelines: Installing tiles in extreme temperatures can affect adhesion. Stick to the recommended temperature range for best results.
Frequently Asked Questions
How Long Do Peel and Stick Tiles Typically Last?
Peel and stick tiles can typically last anywhere from 5 to 25 years, depending on several durability factors. Isn’t it great to think you can enjoy a fresh look for so long? To maximize their lifespan, make sure you follow proper installation tips, like ensuring the surface is clean and dry. With a little care, you can create a welcoming space that feels like home, lasting through everyday life’s ups and downs.
Can I Install Peel and Stick Tiles Over Existing Flooring?
Yes, you can install peel and stick tiles over existing flooring, but there are some installation considerations to keep in mind. Make certain the current flooring is clean, smooth, and compatible with the adhesive. Uneven surfaces can lead to poor adhesion and premature wear. If your existing flooring is vinyl, tile, or even linoleum, it often works well. Just remember, a solid foundation will help your new tiles last longer and look great!
Are Peel and Stick Tiles Waterproof?
Envision stepping onto a floor that feels as solid as a ship’s deck, even in a storm. Peel and stick tiles aren’t entirely waterproof, but they boast impressive water resistance, making them suitable for light moisture areas. To improve their durability, you might want to add moisture barriers beneath. So, if you’re dreaming of a stylish, resilient space, these tiles can be your trusty crew in the battle against spills and splashes!
What Temperature Is Best for Installing Peel and Stick Tiles?
The best temperature for installing peel and stick tiles is between 65°F and 85°F. If it’s too cold, the adhesive may not bond properly, and if it’s too hot, it could cause the tiles to warp. For a successful installation, make sure your workspace is within this temperature range. Following these installation tips can help you achieve a long-lasting finish that you’ll be proud of. Trust me, you’ll love the results!
How Do I Remove Peel and Stick Tiles if Needed?
To remove your peel and stick tiles, think of it like peeling a ripe fruit. Start by gently lifting one corner with a putty knife, then slowly pull the tile away. For stubborn spots, use heat from a hairdryer to soften the adhesive. Once removed, prepare the surface by cleaning any residue with warm, soapy water. This guarantees a fresh start, making your space feel inviting and ready for new adventures.